Laser Engraving Acrylic LED Display
How to customize a unique Acrylic LED Display?

— Prepare
• Acrylic Sheet
• Lamp Base
• Laser Engraver
• Design file for the pattern
More importantly, your idea gets ready!
— Making Steps (acrylic laser engraving)
First of all,
You need to confirm the thickness of the acrylic plate in terms of the width of the lamp base groove and reserve the proper size on the acrylic graphic file to fit the groove.
Secondly,
According to the data, turn your design idea into a concrete graphic file (generally vector file for laser cutting, pixel file for laser engraving)
Next,
Go shopping for acrylic plate and lamp base as data confirmed.For raw materials, we can see an example of 12” x 12” (30mm*30mm)acrylic sheets on Amazon or eBay, whose price is only about $10. If you purchase a larger quantity, the price will be lower.


Then,
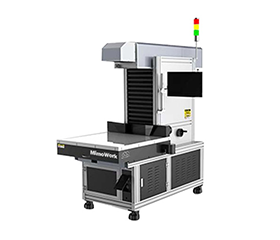
Now you need a "right assistant" to engrave and cut acrylic, a small size acrylic laser engraving machine is a good choice whether for home handmade or practical production, such as MimoWork Flatbed Laser Machine 130 with a 51.18"* 35.43" (1300mm* 900mm) processing format. The price is not high, and it is very suitable for cutting and engraving on solid materials. Especially for artworks and customized products, like woodcraft, acrylic sign, awards, trophies, gifts, and many others, laser machine well works to intricate engraved patterns and smooth cut edges.
Video Demonstration for laser engraving acrylic
Any confusion and questions about how to laser cut acrylic custom
Finally,
Get to assemble the acrylic LED display from the laser engraved acrylic plate and lamp base, connect the power.
Brilliant and amazing acrylic LED display is well done!
Why choose the laser engraver?

Customization is a smart way to stand out from the competition. After all, who knows what customers need better than the customers themselves? Depending on the platform, consumers can control the personalization of the purchased goods to varying degrees without having to pay an excessively large price increase for a fully customized product.
It's time for SMEs to enter the customization business with a thriving market and limited competition.
Laser machines are gaining prominence facing the burgeoning customization marking.
Flexible and free laser cutting and engraving provide more options in practical production whether for small-batch and mass production. No limit to the tool and cutting & engraving shapes, any pattern which only needs to be imported can be plotted by laser machine. Besides flexibility and customization, high-speed and cost-saving laser cutter brings efficiency and sustainability compared with other tools.
You can achieve from acrylic laser cutting & engraving
◾ Contactless processing ensures surface undamaged
◾ Thermal treatment to auto-polishing
◾ Continuous laser cutting and engraving

Intricate pattern engraving

Polished & crystal edge

Flexible shape cutting
✦ Faster and more stable processing can be realized with the servo motor(higher speed for the brushless DC motor)
✦ Autofocus assists in cutting materials in different thicknesses by adjusting the height of the focus
✦ Mixed laser heads offer more options for metal and non-metal processing
✦ Adjustable air blower takes out extra heat to ensure unburn and even carved depth, prolonging the service life of the lens
✦ Lingering gases, pungent odor that may generate can be removed by a fume extractor
Solid structure and upgrade options extend your production possibilities! Let your acrylic laser cut designs come true by the laser engraver!
Acrylic Laser Cutter Recommended
• Laser Power: 100W/150W/300W
• Working Area: 1300mm * 900mm (51.2” * 35.4 ”)
• Laser Power: 150W/300W/500W
• Working Area: 1300mm * 2500mm (51” * 98.4”)
• Laser Power: 180W/250W/500W
• Working Area: 400mm * 400mm (15.7” * 15.7”)
Attentive tips when acrylic laser engraving
# The blowing should be as slight as possible to avoid heat diffusion which could also lead to a burning edge.
# Engrave the acrylic board on the backside to produce a look-through effect from the front.
# Test firstly before cutting and engraving for proper power and speed(ususally high speed and low power are recommended)


