Can you laser engrave paper?
Five step to engrave paper
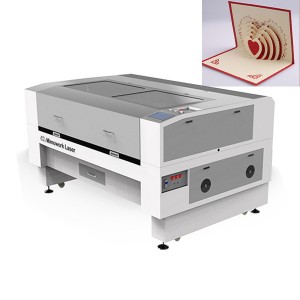
CO2 laser cutting machines can also be used to engrave paper, as the high-energy laser beam can vaporize the surface of the paper to create precise and detailed designs. The advantage of using a CO2 laser cutting machine for paper engraving is its high speed and accuracy, which allows for the creation of intricate and complex designs. Additionally, laser engraving is a non-contact process, which means that there is no physical contact between the laser and the paper, reducing the risk of damage to the material. Overall, the use of a CO2 laser cutting machine for paper engraving offers a precise and efficient solution for creating high-quality designs on paper.
To engrave or etch paper with a laser cutter, follow these steps:
•Step 1: Prepare your design
Use a vector graphics software (such as Adobe Illustrator or CorelDRAW) to create or import the design you want to engrave or etch on your paper. Make sure your design is the correct size and shape for your paper. The MimoWork Laser Cutting Software can work with the following file formats:
1.AI (Adobe Illustrator)
2.PLT (HPGL Plotter File)
3.DST (Tajima Embroidery File)
4.DXF (AutoCAD Drawing Exchange Format)
5.BMP (Bitmap)
6.GIF (Graphics Interchange Format)
7.JPG/.JPEG (Joint Photographic Experts Group)
8.PNG (Portable Network Graphics)
9.TIF/.TIFF (Tagged Image File Format)


•Step 2: Prepare your paper
Place your paper on the laser cutter bed, and make sure it is securely held in place. Adjust the laser cutter settings to match the thickness and type of paper you are using. Remember, the quality of the paper can affect the quality of the engraving or etching. Thicker, higher quality paper will generally produce better results than thinner, lower quality paper. That’s why laser engraving cardboard is the main stream when it comes to etch paper-based material. Cardboard normally comes with much thicker density which can deliver great brownish engraving results.
•Step 3: Run a test
Before engraving or etching your final design, it's a good idea to run a test on a scrap piece of paper to make sure your laser settings are correct. Adjust the speed, power, and frequency settings as needed to achieve the desired result. When engraving or laser etching paper, it's generally best to use a lower power setting to avoid scorching or burning the paper. A power setting of around 5-10% is a good starting point, and you can adjust as needed based on your test results. The speed setting can also affect the quality of the laser engraving on paper. A slower speed will generally produce a deeper engraving or etching, while a faster speed will produce a lighter mark. Again, it's important to test the settings to find the optimal speed for your specific laser cutter and paper type.

Once your laser settings are dialed in, you can begin engraving or etching your design onto the paper. When engraving or etching paper, a raster engraving method (where the laser moves back and forth in a pattern) may produce better results than a vector engraving method (where the laser follows a single path). Raster engraving can help to minimize the risk of scorching or burning the paper, and can produce a more even result. Be sure to monitor the process closely to make sure the paper is not scorching or burning.
•Step 5: Clean up the paper
After the engraving or etching is complete, use a soft brush or cloth to gently remove any debris from the paper surface. This will help to enhance the visibility of the engraved or etched design.
In conclusion
By following these steps, you can use laser engraver marking paper easily and delicately. Remember to take appropriate safety precautions when operating a laser cutter, including wearing eye protection and avoiding touching the laser beam.
Recommended Laser engraving machine on paper
Want to invest in Laser engraving on paper?
Post time: Mar-01-2023


