How to Laser Cut Embroidery Patch | Vision Laser Cutting Machine

How to Laser Cut Embroidery Patch | Vision Laser Cutting Machine

How to Laser Cut Embroidery Patch | Vision Laser Cutting Machine

Your Location: Homepage - Video Gallery

How to Laser Cut Embroidery Patch

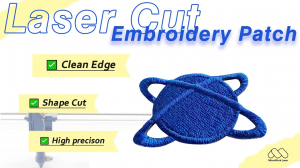
We will take you on a journey through the process of using a CCD laser cutter to create stunning DIY embroidery projects.

Whether you’re interested in making patches, trims, appliqués, or emblems.

This smart laser cutting machine is your ultimate tool for turning your creative ideas into reality.

We’ll start by introducing the CCD laser cutter and its key features.

Emphasizing its advanced capabilities specifically tailored for embroidery applications.

You'll get a behind-the-scenes look at how this innovative machine operates.

Ensuring you understand its functionality and the advantages it brings to your crafting endeavors.

Throughout the video,we’ll showcase the step-by-step process of cutting embroidery patches.

Including selecting the right materials and setting up your designs in the software.

We’ll demonstrate how to upload your custom designs and adjust the settings for optimal results.

Embroidery Patch Laser Cutting Machine 60

Embroidery Patch Laser Cutting – Precision at your Fingertips

Working Area (W*L)

600mm * 400mm (23.6” * 15.7”)

Packing Size (W*L*H)

1700mm * 1000mm * 850mm (66.9” * 39.3” * 33.4”)

Software

CCD Software

Laser Power

60W

Laser Source

CO2 Glass Laser Tube

Mechanical Control System

Step Motor Drive & Belt Control

Working Table

Honey Comb Working Table

Max Speed

1~400mm/s

Acceleration Speed

1000~4000mm/s2

Cooling Device

Water Chiller

Electricity Supply

220V/Single Phase/60HZ


Send your message to us:

Write your message here and send it to us